How to Inject Peptides: Step-by-Step Subcutaneous Guide
A clear, practical walkthrough of subcutaneous peptide injections, from supply setup to sharps disposal. Written for patients new to self-injection with ready-to-use PeRx vials.
In this article
Key Takeaways
- Peptides from PeRx are subcutaneous injections, delivered into the fatty layer just beneath the skin with a small insulin-type syringe.
- PeRx vials arrive fully reconstituted and ready to use. There is no mixing, and no powder to prepare.
- The two most common sites are the abdomen and the outer upper thigh. Rotating sites prevents tissue hardening and keeps absorption consistent.
- Clean technique matters most: wash hands, wipe the vial stopper and the skin, and use a fresh sealed syringe every time.
- Dispose of every used syringe in a sharps container. Never recap, bend, or reuse a needle.
Peptide Injection at a Glance
Route
Subcutaneous (into fatty tissue)
Syringe
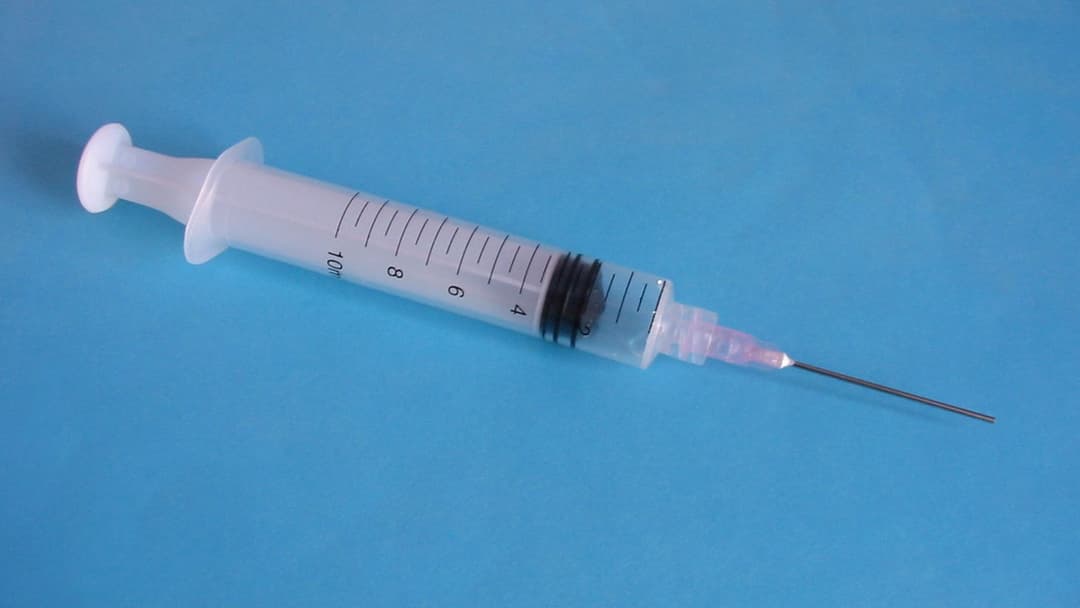
Insulin type, 29-31 gauge, ½ inch
Common Sites
Abdomen, outer upper thigh
Vial State
Ready to use, no mixing
Reuse Needles
Never, fresh syringe each time
Disposal
Sharps container, no recapping
PeRx vials are ready to use
Your peptides arrive fully reconstituted, so there is nothing to mix and no powder to prepare. Store the vial refrigerated until you are ready to inject, then follow the steps below.
What You’ll Need
Before you begin, make sure your supplies are ready. Your PeRx shipment includes everything except a sharps container, which is available at any pharmacy. From your kit you will use the prescribed peptide vial, which arrives ready to use, the insulin syringes (typically 29 to 31 gauge with a half-inch needle), and alcohol swabs. You will also want a clean, flat workspace, a sharps disposal container, and optionally a small bandage or cotton ball. A sharps container can be any FDA-cleared container, or a thick-walled plastic container with a lid.
Never reuse needles
Use a fresh, sealed syringe for every injection. Reusing a needle dulls it, raises infection risk, and makes the injection more uncomfortable.
Prepare and Draw Your Dose
Step 1: Wash your hands
Wash your hands thoroughly with soap and warm water for at least 20 seconds, then dry with a clean towel or paper towel. Hand-washing is the single most effective way to prevent infection at the injection site. Even if your hands look clean, bacteria on the skin surface can be introduced through the needle.
Step 2: Prepare your workspace
Choose a clean, well-lit, flat surface such as a kitchen counter or bathroom vanity. Lay out your supplies within easy reach: the peptide vial, a fresh sealed syringe, alcohol swabs, and the sharps container nearby. Avoid injecting in a rush or in a distracting environment. A calm, focused setup reduces errors and makes the process much easier, especially in the first few weeks.
Step 3: Clean the vial top
Take an alcohol swab and wipe the rubber stopper on top of your vial using a firm, circular motion, then let it air-dry for a few seconds. The rubber stopper is a potential entry point for bacteria, and cleaning it before every draw keeps the medication sterile. Because PeRx ships all peptides fully reconstituted, there is nothing to mix. Simply keep your vial refrigerated at 36-46 degrees Fahrenheit until you are ready to inject.
Step 4: Draw the medication
Pull back the plunger to draw air into the syringe equal to your prescribed dose. For example, if your dose is 0.2 mL, pull the plunger to the 0.2 mL, or 20-unit, mark. Insert the needle into the center of the rubber stopper and push the air into the vial, which replaces the volume you are about to remove and makes drawing easier. Invert the vial so the needle tip is submerged in the liquid, then slowly pull the plunger back to your dose, drawing slightly past your dose line.
While the needle is still in the vial, tap the syringe barrel gently with your fingertip to move any air bubbles to the top, then push the plunger slowly until the bubbles are expelled and the dose reads exactly at your prescribed mark. Remove the needle from the vial and do not set the syringe down or let the needle touch any surface. Always double-check that you have drawn the correct amount. If you are unsure about your prescribed dose, contact your PeRx provider before injecting.
Choose and Clean Your Injection Site
Subcutaneous injections go into the fatty tissue just beneath the skin. The two most common sites are the abdomen and the upper thigh. The abdomen is the preferred site for most patients: choose an area at least two inches away from your belly button, and avoid the belt line and any spots with scars, moles, or bruising. The outer middle third of the thigh is a good alternative if you prefer not to use the abdomen or need to rotate away from a recent abdominal site.
Site rotation is essential
Alternate between left and right sides and vary your exact spot within each region. Repeated injections in the same spot can cause tissue hardening, known as lipodystrophy, which reduces absorption and can be uncomfortable.
Frid AH et al., "New Insulin Delivery Recommendations," Mayo Clinic Proceedings, 2016. (Consensus guidance on subcutaneous injection technique, systematic site rotation, and preventing lipohypertrophy.) View study
Once you have chosen a site, wipe the area with a fresh alcohol swab in a circular motion, moving outward, and let it air-dry completely. Injecting into wet alcohol can sting.
Inject
Using your non-dominant hand, gently pinch a fold of skin about one to two inches wide at your cleaned injection site. This lifts the fatty tissue away from the muscle beneath. Hold the syringe like a dart in your dominant hand and insert the needle at a 45- to 90-degree angle into the pinched skin fold. For most half-inch insulin needles a 90-degree angle is fine, but if you are very lean, use a 45-degree angle to stay in the subcutaneous layer.
Push the plunger slowly, injecting over about 5 to 10 seconds for a typical dose, since rushing can cause discomfort and may reduce absorption. After the plunger is fully depressed, hold the needle in place for 5 to 10 seconds before withdrawing to ensure the full dose is delivered and minimize leakage. Pull the needle straight out, release the skin pinch, and do not rub the site. If you see a small drop of blood or medication at the surface, that is normal. Apply gentle pressure with a cotton ball or bandage for a few seconds.
After the Injection
Dispose of the syringe immediately by placing it needle-first directly into your sharps container. Do not recap the needle, bend it, or throw it in the regular trash. Apply gentle pressure to the site with a cotton ball or clean finger if needed, and use a small bandage if you like. Then log your injection in the PeRx injection logger in your patient dashboard, recording the date, time, site, and any notes. Consistent tracking supports proper site rotation and helps your provider keep your protocol on track.
When your sharps container is about three-quarters full, seal it and dispose of it according to your local regulations. Many pharmacies accept full sharps containers for free, and you can also use a mail-back program if you prefer.
U.S. Food & Drug Administration, "Safely Using Sharps (Needles and Syringes) at Home, at Work and on Travel." Used needles should go immediately into an FDA-cleared sharps disposal container and should never be recapped, bent, or thrown in household trash. View study
Storage and Handling
PeRx ships all peptides fully reconstituted and ready to use. Store your vial in the refrigerator at 36-46 degrees Fahrenheit (2-8 degrees Celsius) and do not freeze it. Keep vials in their original box or a dark area of the refrigerator, since light can degrade peptides over time. Before each injection, inspect the solution. It should be clear and colorless, and you should not use it if it appears cloudy, discolored, or contains particles. Never share vials, syringes, or needles, even between household members using the same peptide. Each patient should have their own clearly labeled supplies.
When to Contact Your Provider
Most subcutaneous injections are straightforward, but contact your PeRx provider if you notice redness, swelling, or warmth at the site that increases over 24 to 48 hours, a hard lump that does not resolve within a few days, or signs of infection such as pus, spreading redness, or red streaks. Reach out for systemic reactions too, including unusual dizziness, nausea, or lightheadedness after injection, or a rash, hives, or itching away from the site. Difficulty breathing or swelling of the face or throat is an emergency, so seek emergency care immediately.
Also contact your provider with any dose concerns: if you are unsure whether you administered the correct dose, if you think you injected into muscle instead of subcutaneous tissue, or if you missed a scheduled dose and are not sure how to proceed. Your PeRx provider is available through your patient dashboard messaging, and no question is too small.
Frequently Asked Questions
Related Guides
Continue reading about peptides and protocols that pair well with this guide.
Pinealon, PE-22-28 & Selank Guide (2026)
Three peptides, three layers of brain support. Pinealon restores sleep architecture through pineal gland regulation. PE-22-28 drives neurogenesis by blocking the TREK-1 potassium channel. Selank calms anxiety through GABA modulation without sedation or dependence. Together they rebuild, grow, and protect neural tissue from three independent angles.
Is CJC-1295/Ipamorelin FDA Approved? (2026 Answer)
The short answer is no. CJC-1295 and Ipamorelin are not FDA-approved drugs. They are compounded medications, prescribed by licensed providers and prepared by regulated pharmacies. Here is what that actually means for you, how it compares to FDA-approved peptides, and why the distinction matters less than most people think.
Is Sermorelin FDA Approved? Yes Until 2008
Sermorelin has a unique regulatory history. It was FDA-approved in 1997 as Geref Diagnostic for testing pituitary function, and its therapeutic form (Geref) was used for pediatric growth hormone deficiency. Then the manufacturer discontinued it in 2008. Today Sermorelin is only available as a compounded medication. Here is the full story.
Ready to get started?
Pharmaceutical-grade peptides, delivered to your door ready to use with the syringes, swabs, and guidance you need.
Medical Disclaimer
The information provided on this website, including all articles, guides, and educational content, is for informational and educational purposes only and is not intended as medical advice, diagnosis, or treatment. Nothing on this site should be construed as a substitute for professional medical advice from a qualified healthcare provider.
The majority of peptides discussed on this site are not approved by the U.S. Food and Drug Administration (FDA) for the indications described. They are classified as bulk drug substances and are available only through a licensed prescribing provider and compounding pharmacy. All treatments require a valid prescription and provider oversight.
The majority of published research on peptide therapies has been conducted in preclinical (animal) models. While early human data is encouraging, comprehensive clinical trial data remains limited for most peptide compounds. Individual results may vary significantly based on health status, injury type, and other factors. No specific outcomes are guaranteed.
Certain peptides discussed on this site are classified as prohibited substances by the World Anti-Doping Agency (WADA) and are banned by major sports organizations including the NFL, NCAA, UFC, NBA, MLB, NHL, and PGA. If you are subject to anti-doping testing, consult your governing body before considering any peptide therapy.
Statements on this website have not been evaluated by the Food and Drug Administration. Products and therapies discussed are not intended to diagnose, treat, cure, or prevent any disease.
© 2026 Wellness MD Group PC DBA PeRx. All rights reserved.
Reviewed by Dr. Cory Mellon, MD · Last reviewed July 2026